Freestyle Pull: The Complete Guide
In This Article
Your freestyle pull produces most of your propulsion while you’re swimming, but there are many things that can affect your technique and slow you down.
In this section of our freestyle guide, we break down the key elements of a powerful and efficient stroke, from hand entry and catch to pull and hand exit, to help you swim your best no matter your swimming background. Also try our drills, sets, and dryland exercises to keep your pull efficient and powerful.


This is the detailed page on freestyle pulling. You can find the other three parts of the stroke broken down in detail below.
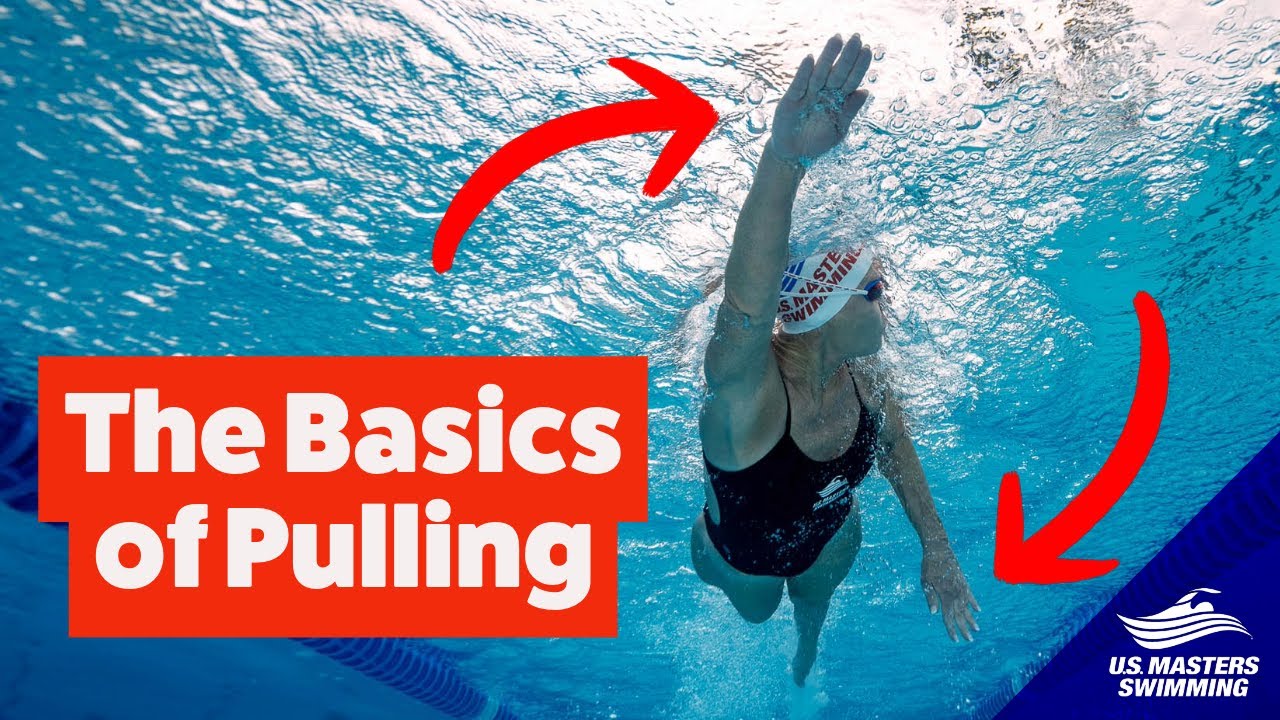
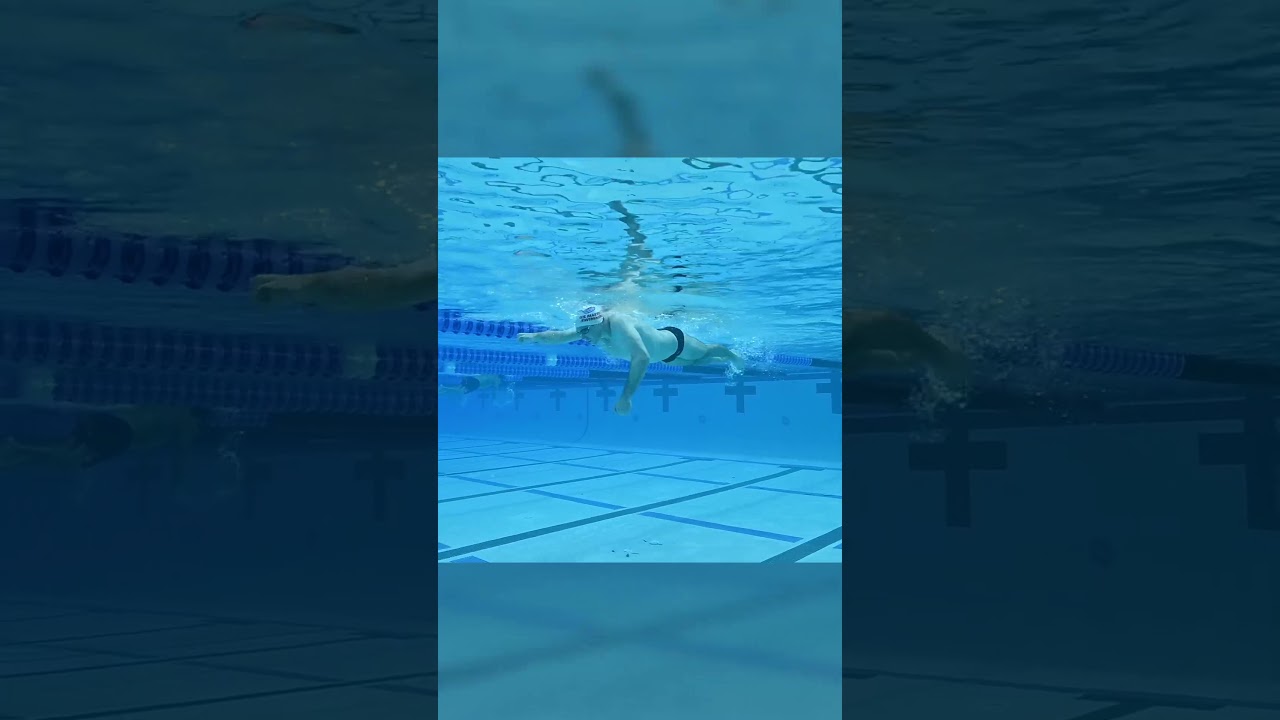
The pull is your engine in freestyle. It’s responsible for most of the propulsion you create, and it’s what helps you move forward and create speed. Although all the components of freestyle are important and required, the pull is the most important when it comes to moving forward. It’s where most of the work is done.
A great pull is simple. The goal is to create a large paddle with your whole arm and then use that paddle to push backward against the water and move yourself forward. There are two major components to the pull. The first is more of a set-up phase. After your arm enters the water, it needs to be repositioned so that it faces backward, ready to push against the water. Once it is, then the second half of your pull begins: a strong and fast motion that pushes water backward and moves you forward. Executing both components is critical for a great pull.
During the freestyle pull, all the major muscles of your upper body are engaged. The largest muscles of your upper body, your pectorals, latissimus, and teres major, are responsible for creating most of the force during the most important part of the pull. These muscles are the engine. During the final part of your pull, your triceps are also heavily involved in the finish of the stroke. Throughout the stroke, your deltoids, rhomboids, trapezius, and rotator cuff are involved in positioning and stabilizing your scapula and shoulder. They work hard to ensure your arm is positioned to optimally create a great pull and maintain those positions throughout your pull.
Want to Improve Your Swimming?
Input your email below to get great swimming articles, videos, and tips sent to you monthly. (USMS members already get it)
Thanks! We just sent you your first email and will you should receive at least one monthly.
Big Picture for Your Arms
Every phase of your freestyle pull involves creating propulsion or preparing to create propulsion. Propulsion moves you forward in the water and only comes when you’re in what’s called the propulsive phase of your stroke.
The main propulsive phase of freestyle is the middle of your pull, after your catch and before the exit. This is the part of your stroke where you’ll want to exert a lot of effort.
Every other aspect of your stroke should prepare for your propulsive effort. As such, your goal should be to minimize the effort you expend during all the preparatory phases.
Following your pull, smoothly transition into your arm recovery, bringing your arm forward over the water. You should reposition your arm with as little effort as possible. Following your recovery, your hand will reenter the water in preparation for another pull. Upon entry, reposition your arm during your catch to prepare for an effective pull. Once you reposition your arm, perform another pull to continue your stroke cycle.
Remember: Each phase of your pull is affected by the previous phase and affects the subsequent phase. Errors in any phase can result in errors in every phase. No phase is more important than others because they all influence each other. When you’re looking to improve in one area of your stroke, look to other phases that may be negatively influencing the targeted area.
Hand-Entry Basics
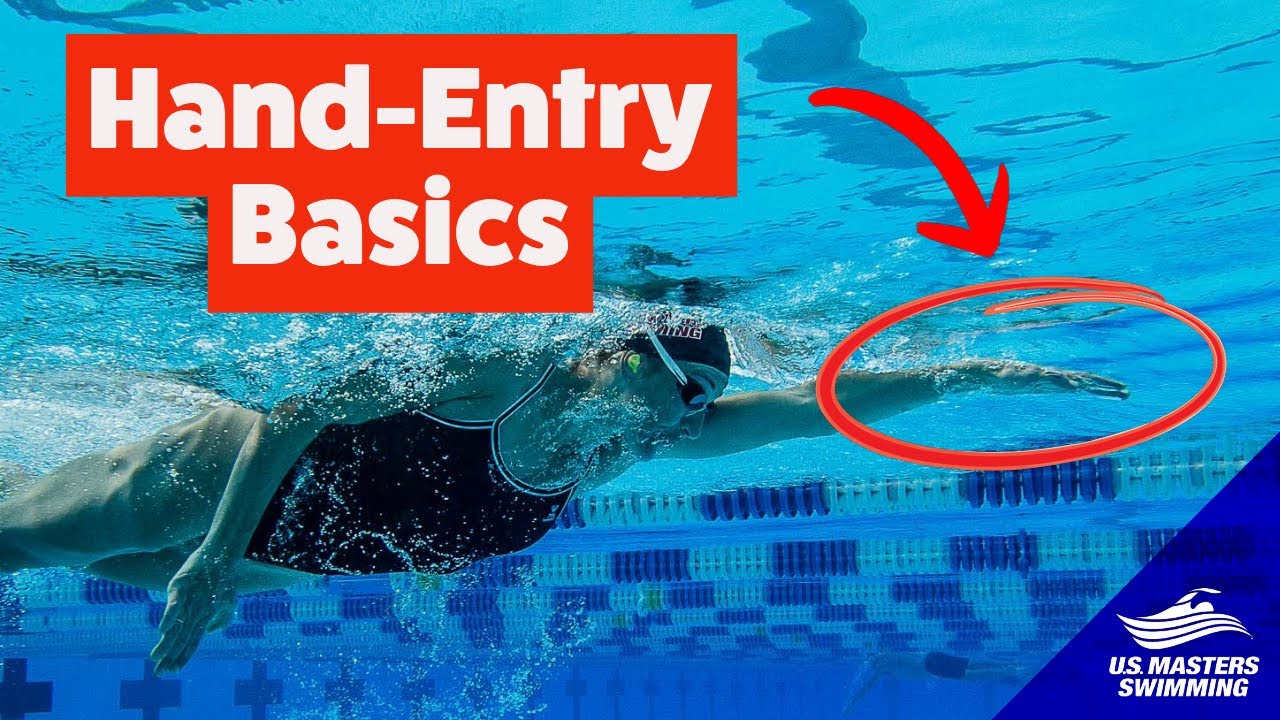
Because your hand entry sets up your catch and pull, an effective entry is a key aspect of the arm cycle. A good hand entry is characterized more by what it doesn’t do than what it does do. A great entry is simple: approximately shoulder-width apart and moving forward and slightly down upon entering the water. There are no tricks for a great entry, beyond avoiding mistakes that compromise its effectiveness.
Your hand entry should be around shoulder-width apart or slightly narrower to provide the best opportunity for you to execute successive phases of your stroke. Wide hand entries make it difficult to pull effectively and tend to disrupt alignment by preventing adequate rotation of your shoulder. Very narrow entries make it more difficult to pull effectively because your arm is in a weak position and disrupts alignment because you’ll pull your arm across your body.
The trajectory of your hand matters as well. Your hand should enter forward and slightly down. If your hand is entering straight down, that will compromise the next phase of your stroke because it tends to eliminate your catch. If your hand is entering at a sideways angle, your arm is going to be out of position to effectively set up for the catch because your hand will end up narrow or wide. Hand entries can be compromised because of poor arm recoveries, so if you’re having difficulty adjusting your hand entry, you may need to adjust your recovery first.
In terms of hand position, elite swimmers enter with their hands relatively flat. Some may enter with their thumb down slightly and some with their pinkie down slightly. These differences are either of little consequence or they’re strategies that best suit each athlete’s specific structure. In other words, aim for a relatively flat hand position, and don’t sweat it if your hand is angled slightly in either direction. If it is, it could be an intuitive adjustment based on the mobility of your upper body.
Want to Improve Your Swimming?
Input your email below to get great swimming articles, videos, and tips sent to you monthly. (USMS members already get it)
Thanks! We just sent you your first email and will you should receive at least one monthly.
Simplifying Your Catch
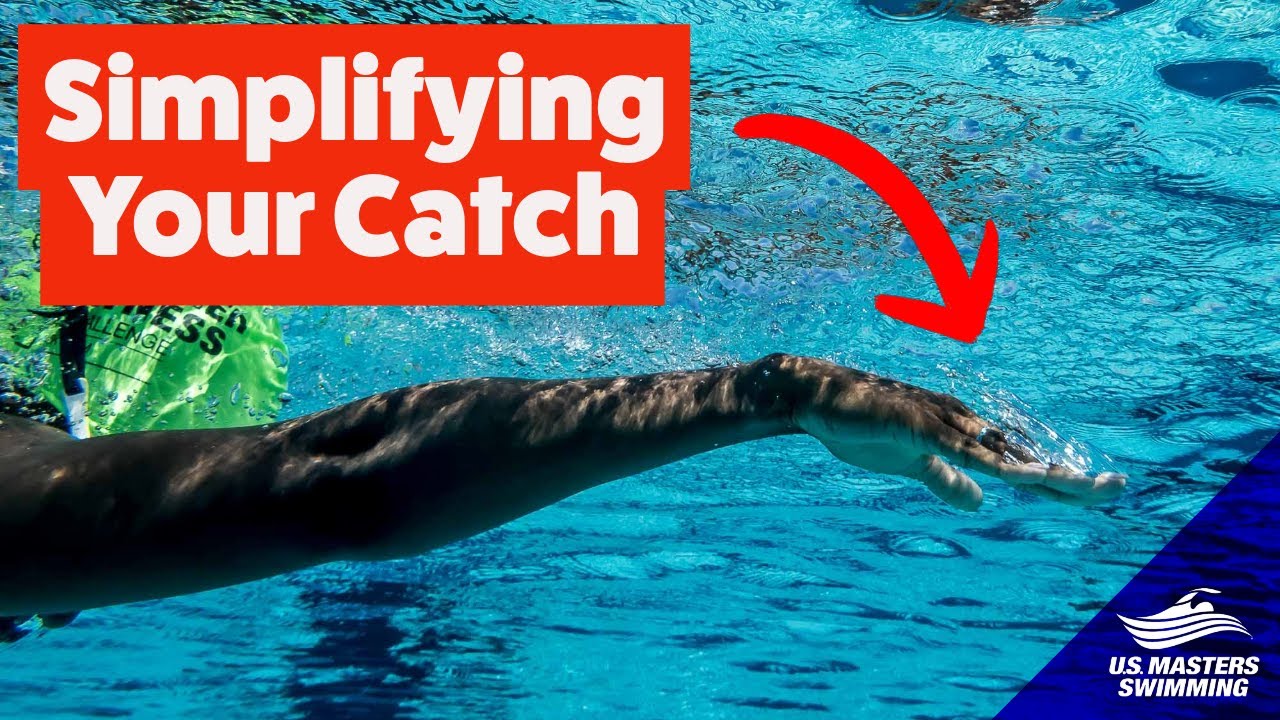
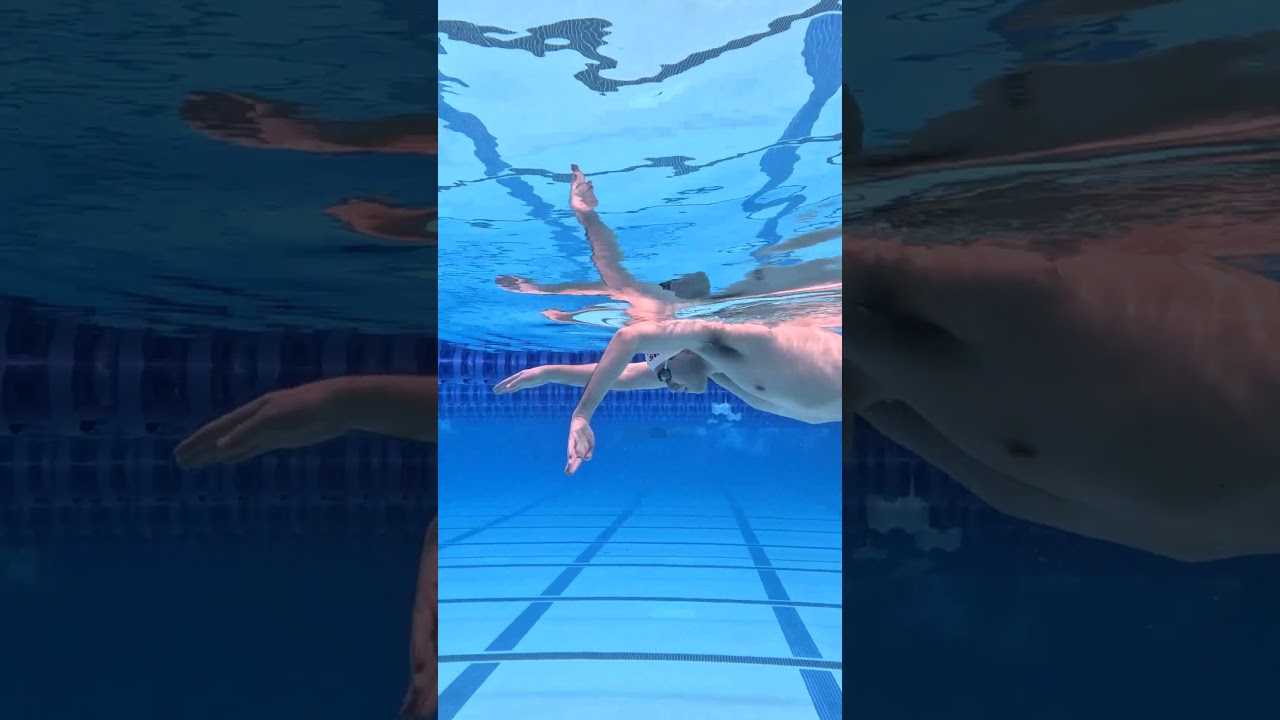
Using the word “catch” to describe the initial phase of your pull has led to many misconceptions about what it entails. Your catch doesn’t involve grabbing or holding water; it’s simply repositioning your arm in preparation for creating propulsion with an effective pull. When you think about it this way, it’s much easier to effectively execute the beginning of your stroke.
To pull effectively, you need to push backward against the water as hard as possible. This requires establishing a large surface area with which to do so. Your hand and forearm fit the bill here. To pull effectively, have your hand and forearm facing backward. The purpose of your catch is to go from the outstretched position following entry to this backward-oriented position as smoothly and easily as possible.
To execute this phase of your stroke, drop your hand down and in from the outstretched position while your elbow bends, pointing out to the side. The end position is one in which your hand is deep and your elbow is pointed out to the side.
The action should be smooth and the change in position shouldn’t require much effort. Think about repositioning as opposed to actively pulling. The goal is to get in position to pull directly backward as quickly and as easily as possible. Thinking about wrapping your arm around the water can be helpful.
A bad hand entry can cause mistakes during your catch. If your hand enters the water out of position, it becomes difficult to effectively perform your catch and orient your arm backward. Attempting to rush or overpower your catch can lead to mistakes. This typically results in your arm failing to orient backward prior to pulling. As with hand entries, once your arm is out of position and no longer facing backward, it’s very difficult to get it back in the proper position.
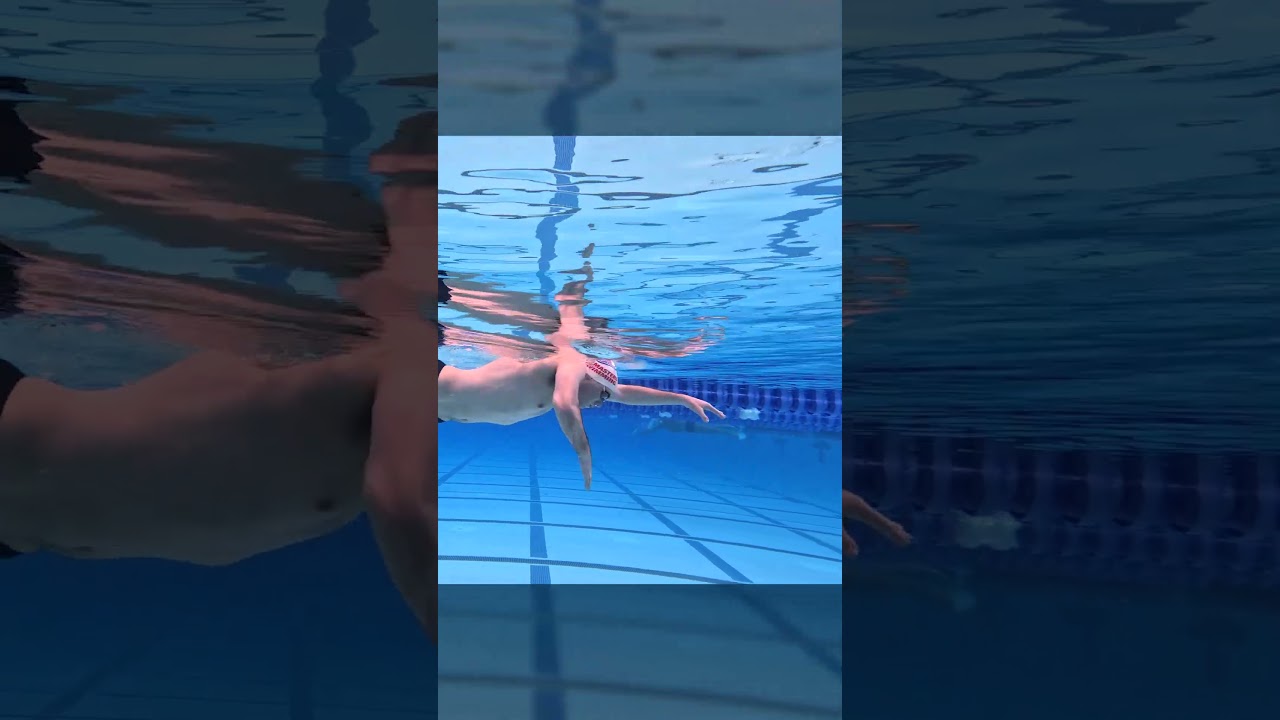
Maximizing Your Pull
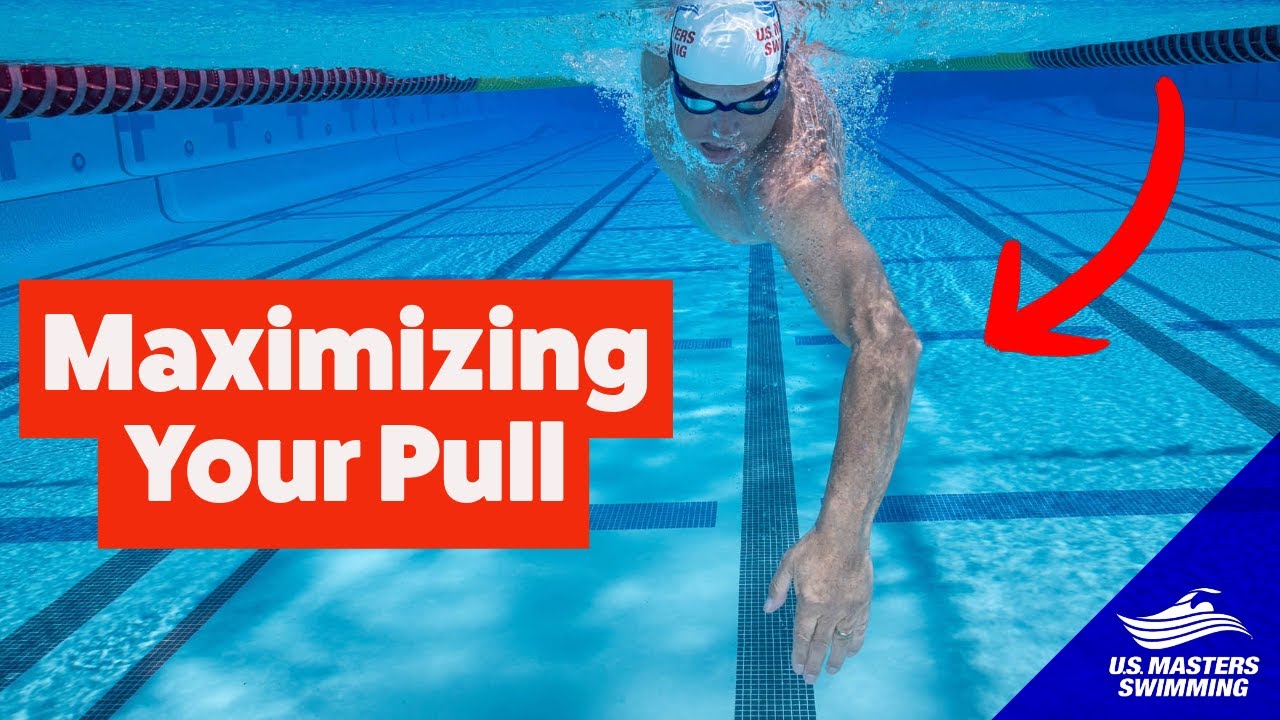
Once you’ve repositioned your arm during your catch, it’s time to execute the main propulsive phase of your stroke: the pull. The main goal of your pull is to push as hard as possible backward against the water so that you move forward. Although there’s some debate as to exactly how propulsion is created, it’s clear that you’ll maximize propulsion with arm actions that have a predominantly backward trajectory. Don’t do any deliberate sculling. Your primary focus should be on pulling and pushing directly backward.
An effective catch should create a large surface area with your hand and forearm, with which you can push backward against the water. Once you’ve created a large surface area, your goal should be to maintain the same surface area as long as possible throughout your pull. Doing so requires you to maintain the same position established in the catch: a deep hand position with your elbow out to the side.
The speed at which you move your hand also affects the amount of propulsion you create. The faster you move your hand, the more propulsion you create. More important: Increase your hand speed throughout your pull. When attempting to sprint, start with a high hand speed and get faster; if you’re doing a distance swim, start much slower and end slightly faster on your pull.
Pulling mechanics can be portrayed as quite complicated, and in many ways, they are. Simple and effective are what’s actionable, however. To keep it simple, an effective pull is one in which you move a large surface area directly backward for as long as possible while increasing your arm speed. Don’t worry about specific angles or positions.
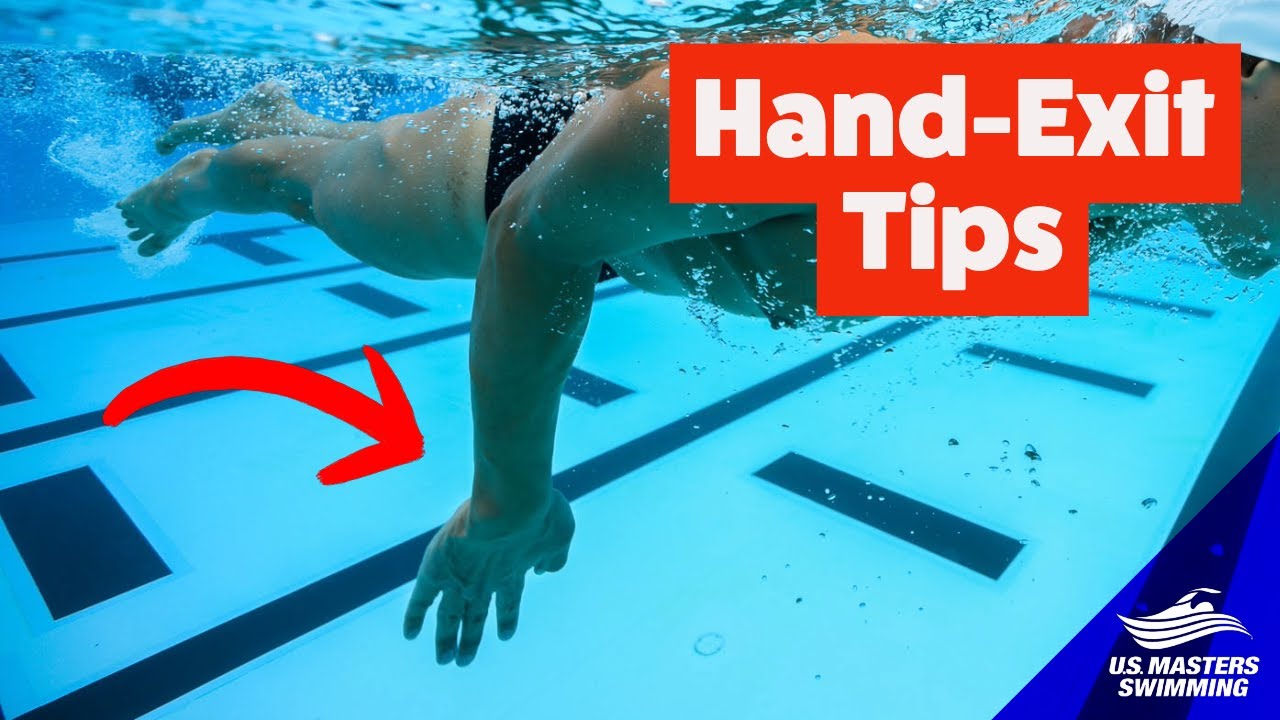
Hand-Exit Tradeoffs
A key skill in good freestyle is navigating the transitions between different phases of your stroke. Great swimming is easy and fluid, which is in large part because of smooth transitions between the different phases of your stroke.
One of the most important transition points is when your hand finishes the underwater propulsive phase and moves into the recovery phase. This transition point is critical because it allows for an effortless recovery when performed well.
Pushing all the way back to the finish of your stroke can provide additional propulsion to each stroke. Because there’s very little surface area moving backward at this point (just your hand) and the muscles performing the work are relatively small (just your triceps), you won’t create much propulsion, however. Finishing your stroke also eliminates the momentum of your arm, making it more difficult to effortlessly swing your arm through your recovery, which can lead to hand-entry errors and early fatigue.
To adequately perform this transition, during the last part of your pulling phase, think about pulling back and up, rather than just straight back. This will ensure that you finish your stroke as much as possible while maintaining momentum to adequately transition to your arm recovery.
As a good point of reference, your hands should finish your pull just past your hips. Your arm should not be completely straight at this point. If your arms are short, you might pull just to your hip, whereas you might pull well past your hip if your arms are particularly long.
If you’re pulling for too long, you may need your arm to exit the water sooner, which will feel like you’re shortening your pull. In contrast, if you typically exit too soon, you’ll want to feel like you’re extending your pull.
Want to Improve Your Swimming?
Input your email below to get great swimming articles, videos, and tips sent to you monthly. (USMS members already get it)
Thanks! We just sent you your first email and will you should receive at least one monthly.
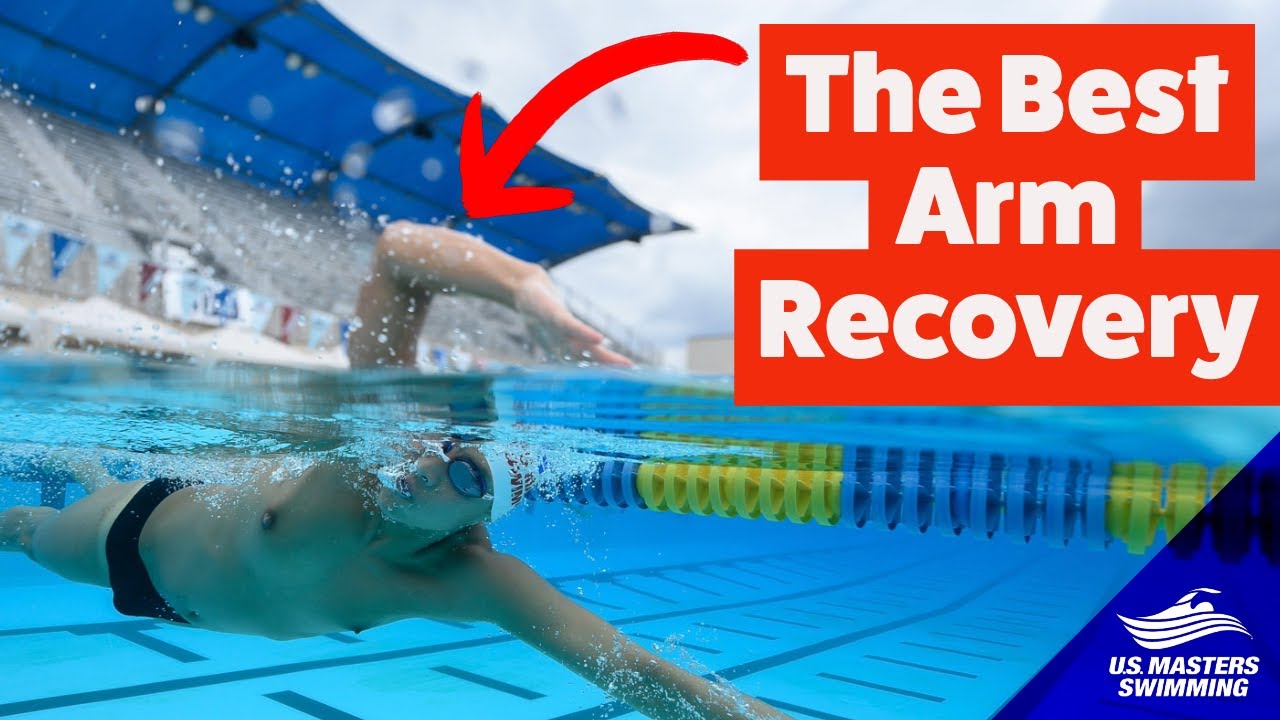
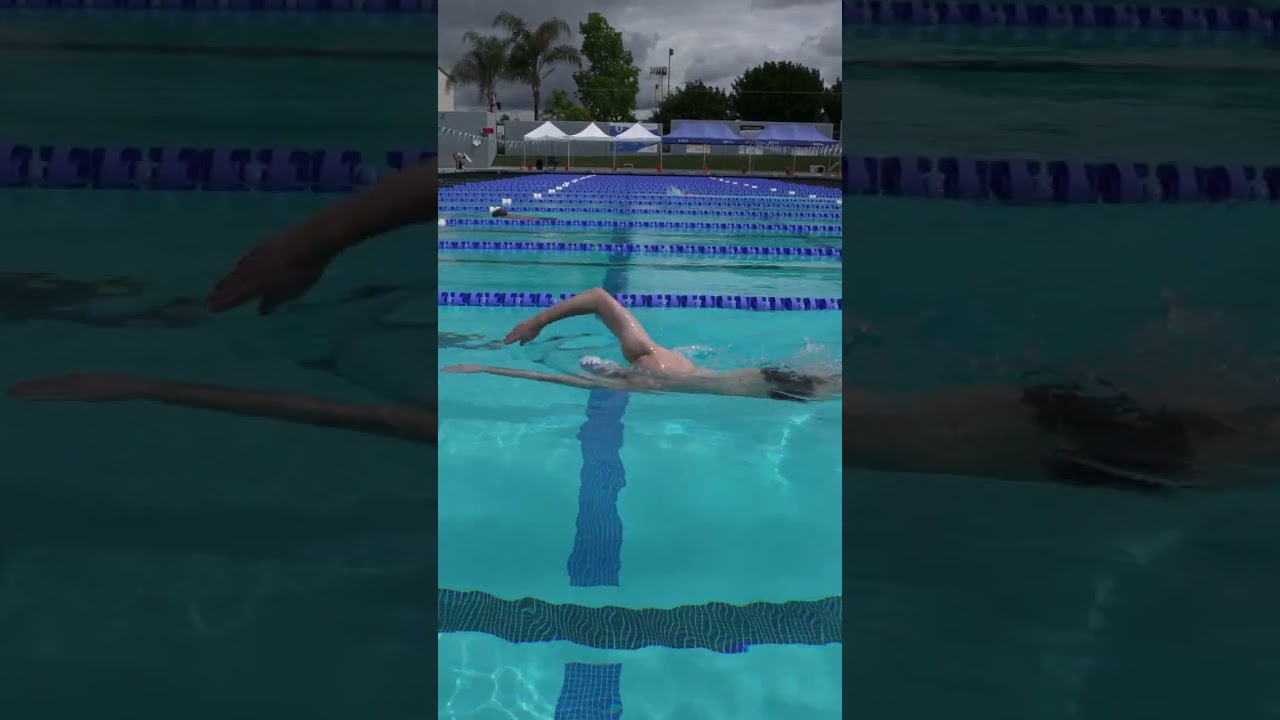
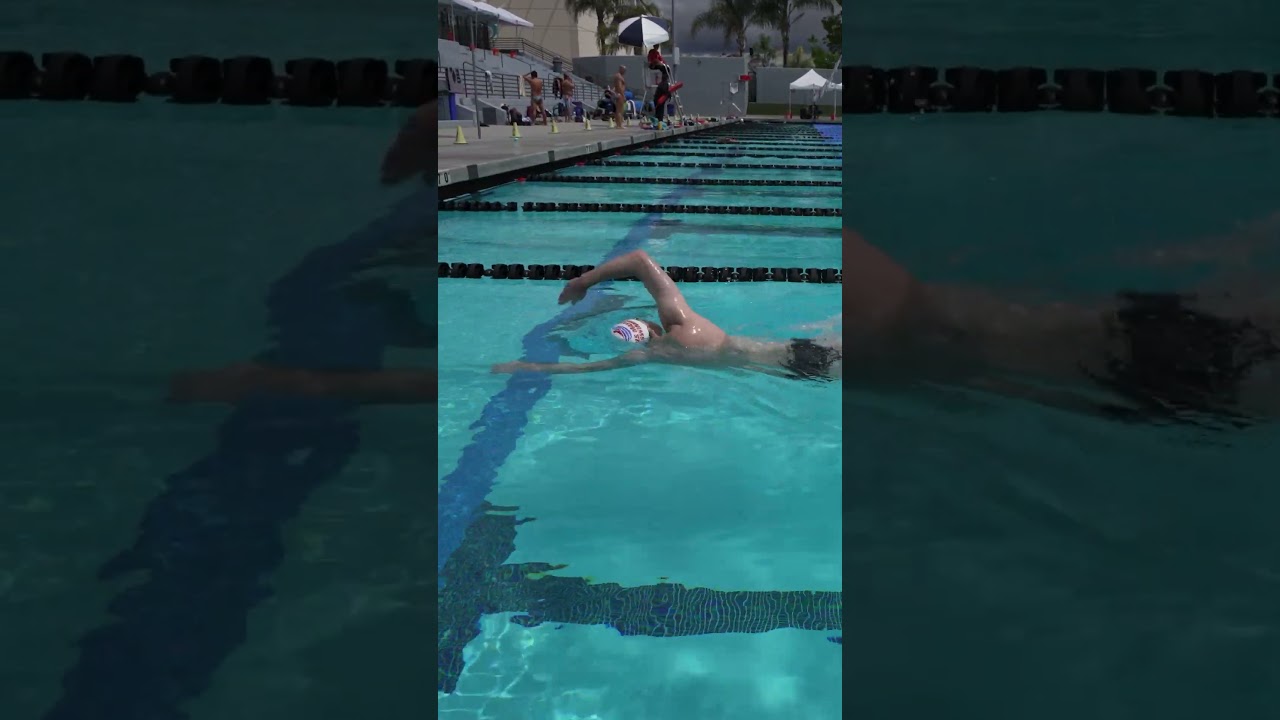
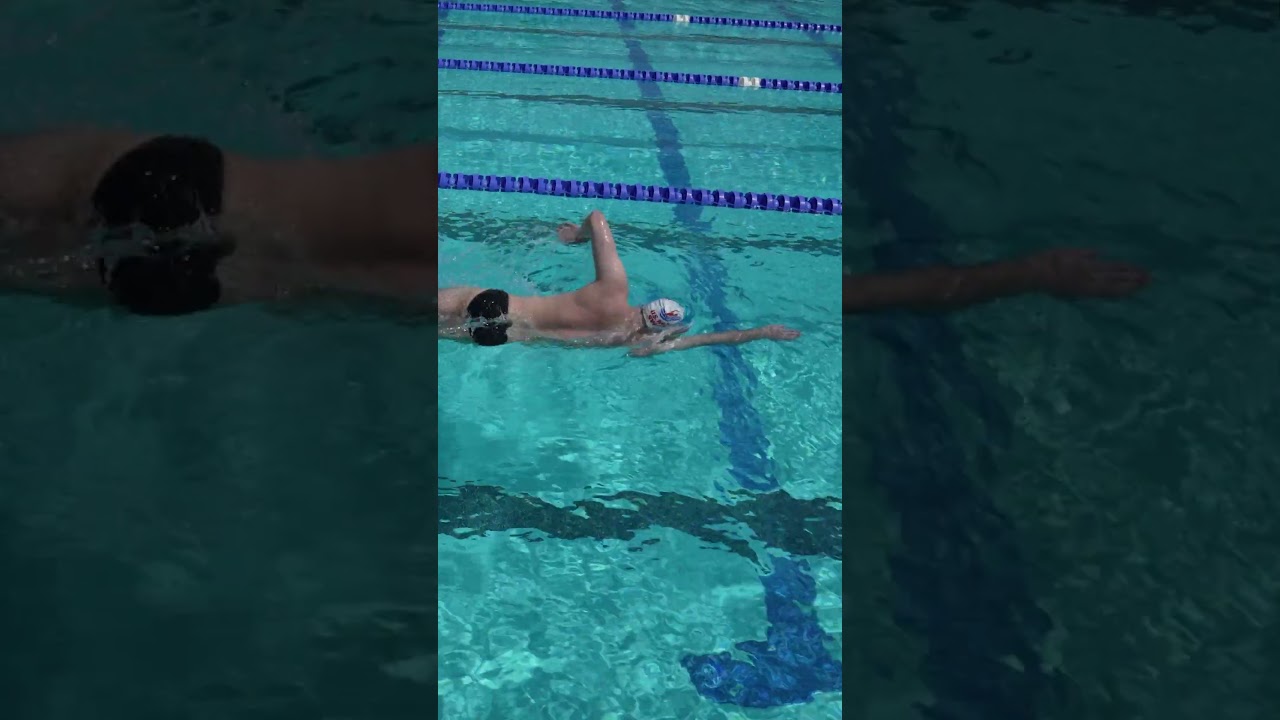
Finding Your Best Arm Recovery
If you watch any workout or competition, you’ll see a lot of recovery styles, all with varying levels of effectiveness. Some swimmers’ arms are bent, some are straight, some recoveries are high, and some are low.
There are multiple recoveries that can be effective if they accomplish the three objectives described below. Rather than attempting to conform to a specific arm recovery, ensure that your recovery is effective.
- As the term implies, a good arm recovery should allow for your arm to rest. If you use a lot of effort to bring your arms forward, you’ll get tired quicker and swim slower. This is why the transition from your arm pull to your recovery during the exit is so important. If you can use momentum to swing your arm into your recovery, you’ll save a lot of effort.
- Next, your arm recovery must allow for an effective hand entry. If your arm recovery comes well over the top and causes your hand to crash into the surface of the water, your hand entry will be compromised. An arm recovery that swings across your body and leads to a hand entry that comes across your face will set the stage for a pull that crosses over your body. An arm recovery that leads to a wide hand entry will prevent you from executing a pull with the strong muscles of your body. Your arm recovery needs to follow a path that allows for your hand to enter the water in a way that sets up the rest of your stroke.
- Your arm recovery should also minimize any lateral disruption of your body alignment. If you swing your arms low and wide, your shoulders will shift in the opposite direction. This will cause your hips to shift back opposite of your shoulders. When this happens on both sides, it creates a wiggling problem in the water, which slows you down. The only solution is to improve your arm recovery.
- All of the articles were written by Andrew Sheaff
Pull Drills
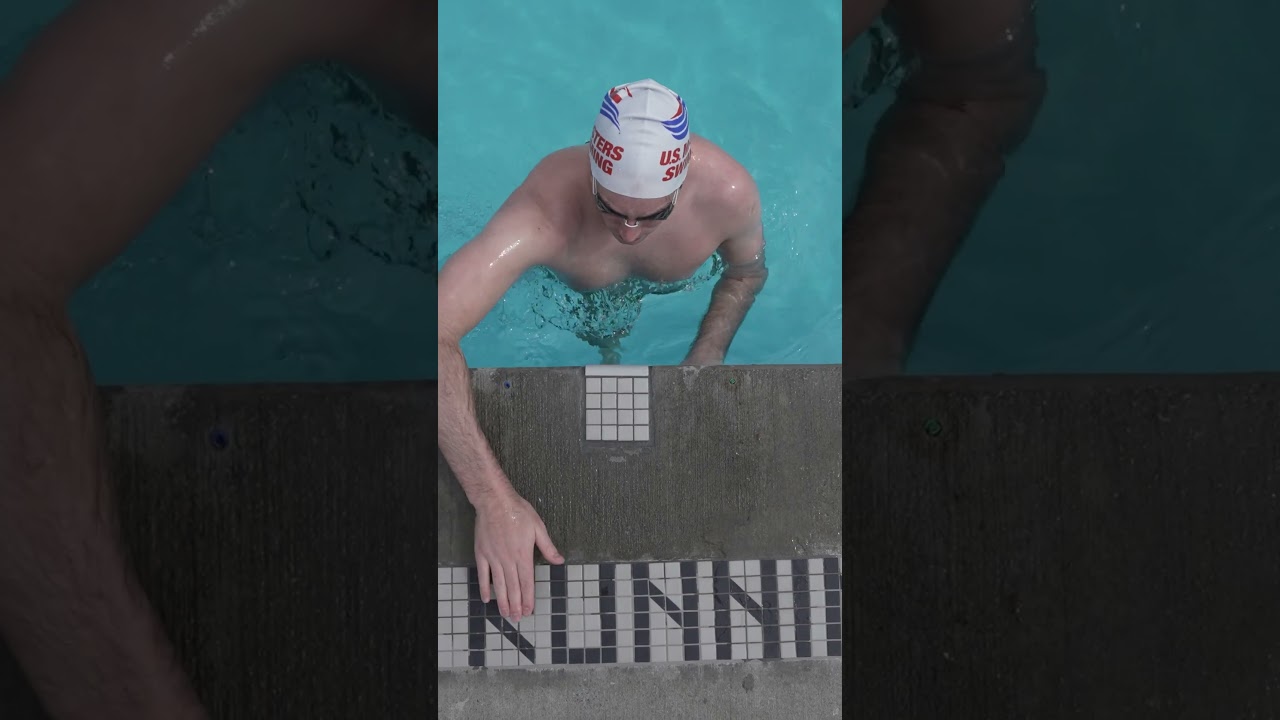
Wall Pull
Many swimmers struggle to understand how their entire hand and forearm can be used to move water, and they also struggle to understand what it means to pull directly backward.
This drill provides the opportunity to learn what it feels like to execute both skills in a simple environment without worrying about doing so while swimming. The goal is to focus on creating pressure with your whole arm, as well as experimenting with different positions of your arm.
To perform this drill, from in the water, place your hands and forearms on the surface of the pool deck at approximately the width and angle of your arm pull, choosing a comfortable position. Begin to put pressure onto the deck with your whole arm, lifting your body up and then letting it back down. You can kick to help you perform this drill.
Power Pulls with Buoy
This drill builds upon the wall pull. It’s essentially the same exercise but performed in the water. The two work well in combination.
The goal is to use as much of your arm as possible to create a big surface area to pull with. Focus on pulling directly backward, accelerating your hands through your pull. Make the drill more effective by trying to reduce the number of strokes you need to get across the pool.
To perform this drill, lie flat in the water with your arms stretched out in front of you and a buoy between your legs. From this position, rotate both of your arms down toward the bottom of the pool and then pull straight back. Recover your arms underwater at the same time and return to the outstretched position.
Human Paddle
Building upon the power pull, human paddle introduces the task of executing direct arm pulls one arm at a time. Again, the main goal is to use as much of your arm as possible to create a big surface and then pull directly backward. Aim to make the pressure on your arms as equal as possible.
At first, it can be beneficial to perform this exercise with a buoy to ensure that any issues with your body position don’t distract from the primary objective of the drill.
To perform this drill, lie flat in the water with your arms stretched out in front of you. From that position, rotate one arm down toward the bottom of the pool and then pull straight back. Recover your arm underwater and return to the outstretched position. Repeat with the opposite arm.
This drill can be performed with a buoy or a consistent flutter kick throughout.
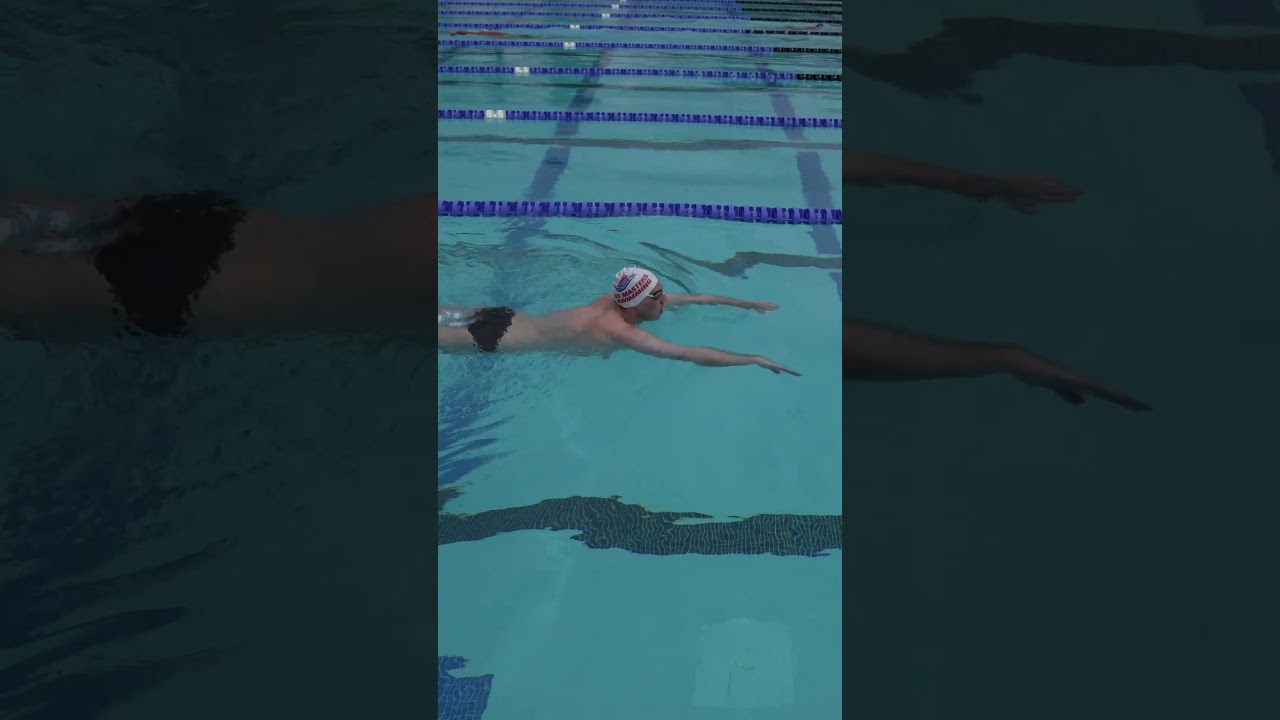
Underwater Recovery
One of the challenges associated with executing a great arm pull is doing so within the rhythm and timing of your stroke. Underwater recovery allows you to work on your arm pull without the complications of overwater recovery. While doing this drill, focus on using a big surface area to pull directly backward.
To perform this drill, lie flat in the water with your arms stretched out in front of you. From that position, rotate one arm down toward the bottom of the pool and then pull straight back. Upon completing your pull, recover your arm underwater and return to the outstretched position. As your arm begins to recover, rotate your opposite arm down toward the bottom of the pool and then pull straight back. Your arms should be moving in opposition, just as in freestyle. This drill is the same as freestyle except your arms recover underwater.
Power Catch-Up
Now that you have a solid understanding of how to execute effective arm pulls, it’s time to incorporate over-the-water recoveries. This drill is the same as human paddle with the addition of an overwater recovery. Focus on transitioning smoothly from the end of your pull to your recovery, and then from your recovery to an entry directly in front of your shoulder.
At first, it can be beneficial to perform this exercise with a buoy to ensure that any issues with body position don’t distract you from the primary objective of the drill.
To perform this drill, lie flat in the water with your arms stretched out in front of you. From that position, rotate one arm down toward the bottom of the pool and then pull straight back. Recover your arm over the water and return to the start position. Repeat with your opposite arm. This drill can be performed with a buoy or a consistent flutter kick throughout.
Over-Under Freestyle
With this drill, your direct pull and overwater recovery must now be incorporated into the rhythm of your stroke. This requires more precise timing and transitions between each phase of your stroke.
By continuing to recover one arm under the water, it ensures that the timing of your arm pulls and arm recoveries are appropriately synced with the rotation of your body. This timing can be lost when moving directly into freestyle.
This drill is the same as freestyle except one arm recovers underwater, and the other arm recovers over the water. To perform this drill, lie flat in the water with your arms stretched out in front of you. Rotate one arm down toward the bottom of the pool and then pull straight back. Upon completing your pull, recover your arm underwater and return to the start position. As your arm begins to recover, rotate your opposite arm down toward the bottom of the pool and then pull straight back. This second arm will recover over the water. Your arms should be moving in opposition, just as in freestyle.
Closed Fist
By closing your fists, you’re forced to better integrate your forearm into your pull to compensate for the smaller surface area pushing against the water. This helps you learn to use all the surface area that your arm provides. Furthermore, when you reopen your hands, it’s much easier to feel the water.
This drill can be introduced with any of the previously mentioned exercises. Simply close your fist and experience similar benefits.
Squeeze your hand tight into a fist and keep it tight throughout your entire stroke cycle.
Upside-Down Paddles
By holding your paddle upside down, your wrist is locked in place, requiring your hand and forearm to move as one unit. This ensures that your forearm is better integrated into your stroke, which increases the surface area you can push against the water with.
It’s a simple and effective way to promote good pulling mechanics. This drill can be introduced with any of the above drills.
To perform this drill, rather than wearing your paddles, grip the top of them. Your paddle should rest on the inside of your forearm, blocking your wrist from bending forward. Swim normally.
Pinch Paddles
Building on the previous drill, pinch paddles promotes integration of your forearm and hand. Because of the position of your paddles, if you don’t maintain a firm wrist, it’ll be very difficult to use the paddle. The stiff wrist allows you to use your forearm in addition to your hand to create propulsion.
This drill can be introduced with any of the previously mentioned exercises.
To perform this drill, rather than wearing your paddles, hold them by pinching the side of your paddle. Your fingers will be on one side of the paddle and your thumb will be on the other side. It works best to pinch along the long side of the paddle, but pinching from any position will have the desired effect. Swim normally.
Stroke-Count Swimming
Counting your strokes is a measure of swimming efficiency. The fewer strokes you can take, the more efficiently you’re swimming. It’s a great way to get objective feedback.
Although many swimmers are aware of their times, it’s valuable to be aware of stroke count as well. Counting your strokes can make all the exercises above more effective because a lower stroke count implies that you’re moving more water backward with each pull and therefore propelling yourself forward in the water.
To perform this drill, simply count your strokes as you swim. You can aim to hit a specific number of strokes, or you can simply observe how many strokes you take. Every time your hand enters the water counts as one stroke.
- All of the drills were written by Andrew Sheaff
Want to Improve Your Swimming?
Input your email below to get great swimming articles, videos, and tips sent to you monthly. (USMS members already get it)
Thanks! We just sent you your first email and will you should receive at least one monthly.
Pull Sets
Set 1
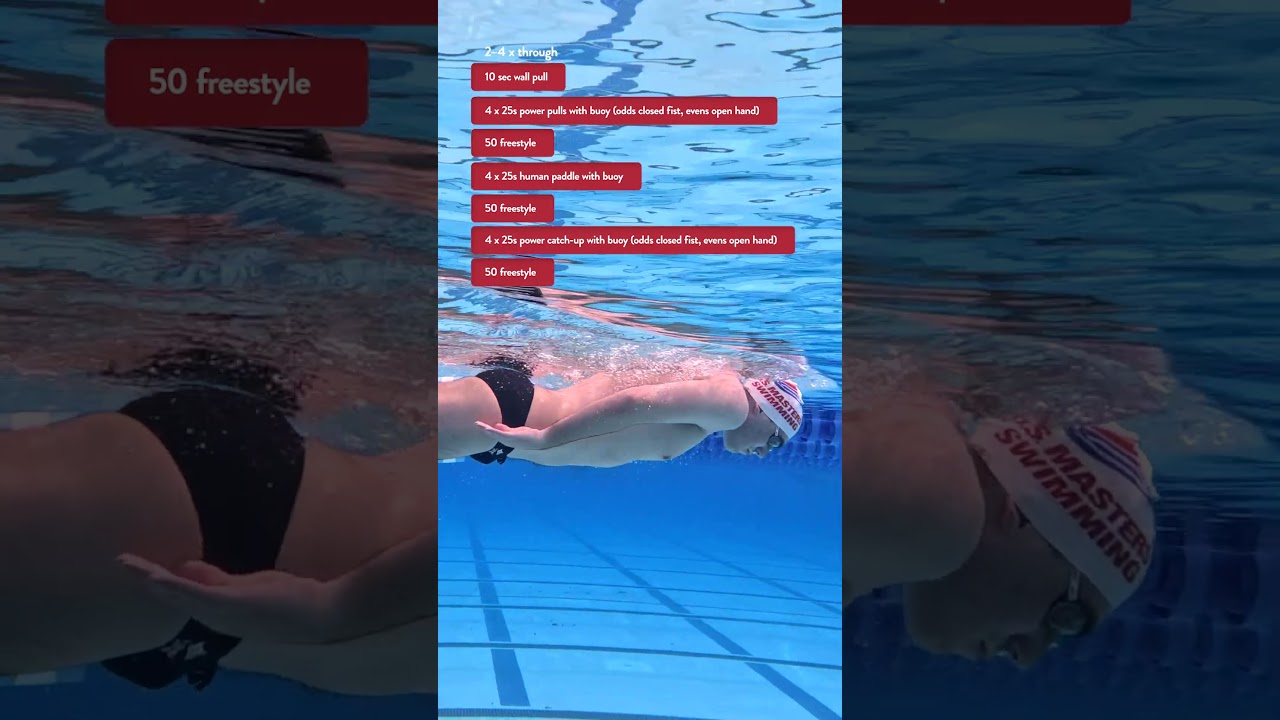
(2–4 times through)
Perform 10 seconds of wall pull before each repetition
Take 10–15 seconds rest between repetitions
- 4 x 25s power pulls with buoy (odds closed fist, evens open hand)
- 50 freestyle
- 4 x 25s human paddle with buoy (odds closed fist, evens open hand)
- 50 freestyle
- 4 x 25s power catch-up with buoy (odds closed fist, evens open hand)
- 50 freestyle
Purpose and Focus Points
The purpose of this set is to introduce the drills and focus on establishing a pull that uses your forearm and hand to push backward against the water.
The wall pull drill creates sensory awareness of the desired skill before each repetition. The goal is to focus on pulling directly backward with your whole arm during the wall pull, and then recreate these sensations throughout the set while swimming.
The drills become more complex as the set goes on, and the aim is to maintain the same level of skill. To help reinforce these skills, closed fist repetitions are included to encourage the use of your forearm. Each series of drills is followed by a freestyle repetition to practice these skills during the goal movement of freestyle.
Set 2
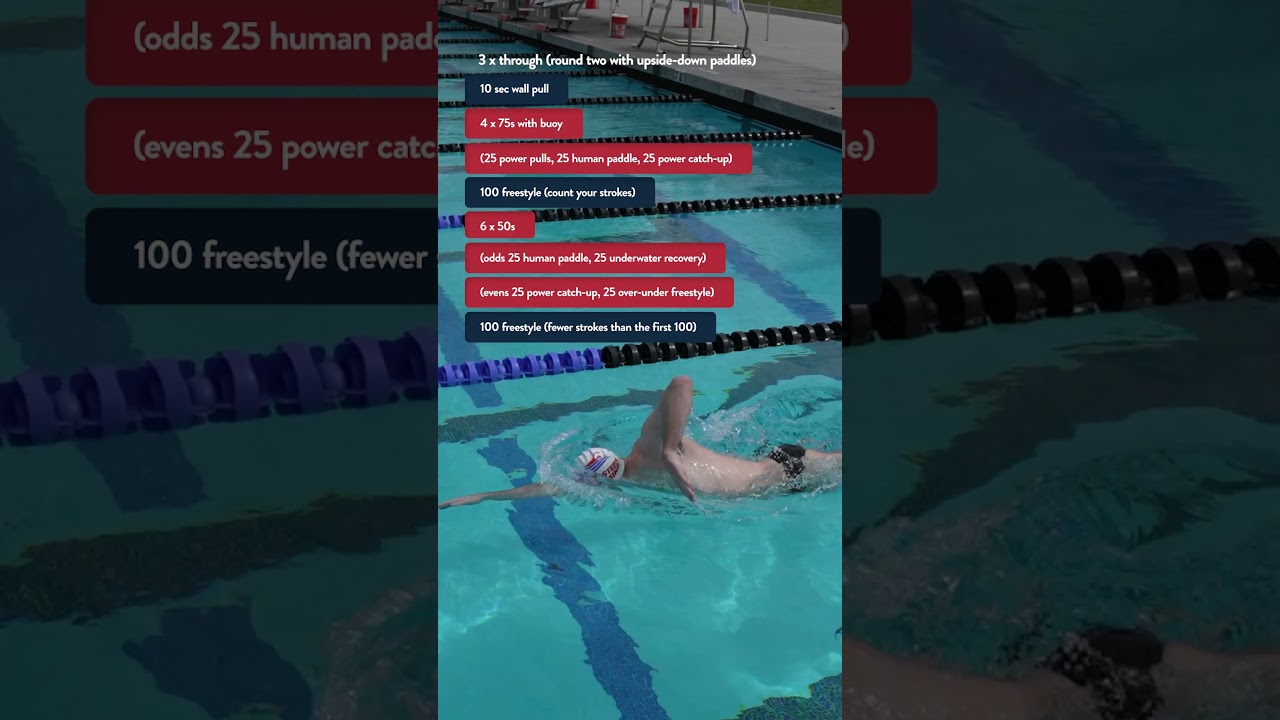
(3 times through)
Round 2 is performed with upside-down paddles
Perform 10 seconds of wall pull before each repetition
Take 10–15 seconds rest between repetitions
- 4 x 75s with buoy (25 power pulls, 25 human paddle, 25 power catch-up)
- 100 freestyle, count your strokes
- 6 x 50s (odds 25 human paddle, 25 underwater recovery; evens 25 power catch-up, 25 over-under freestyle)
- 100 freestyle, take fewer total strokes than in the first 100
Purpose and Focus Points
This set builds upon the same skills as the previous set. The goal is to learn to execute a pull that uses your forearm and hand to pull directly backward. The wall pull reinforces this skill and is included prior to each swimming repetition.
This set has longer distances and combines different drills to provide learning opportunities. There’s a focus on including the rotational aspect of the pull by using the underwater recovery and over-under freestyle exercises.
This set also begins to put some hard numbers on performance. You’ll need to count your strokes and aim to reduce that number as the set progresses, indicating a more effective pull.
Set 3
Take about 20 seconds rest between repetitions
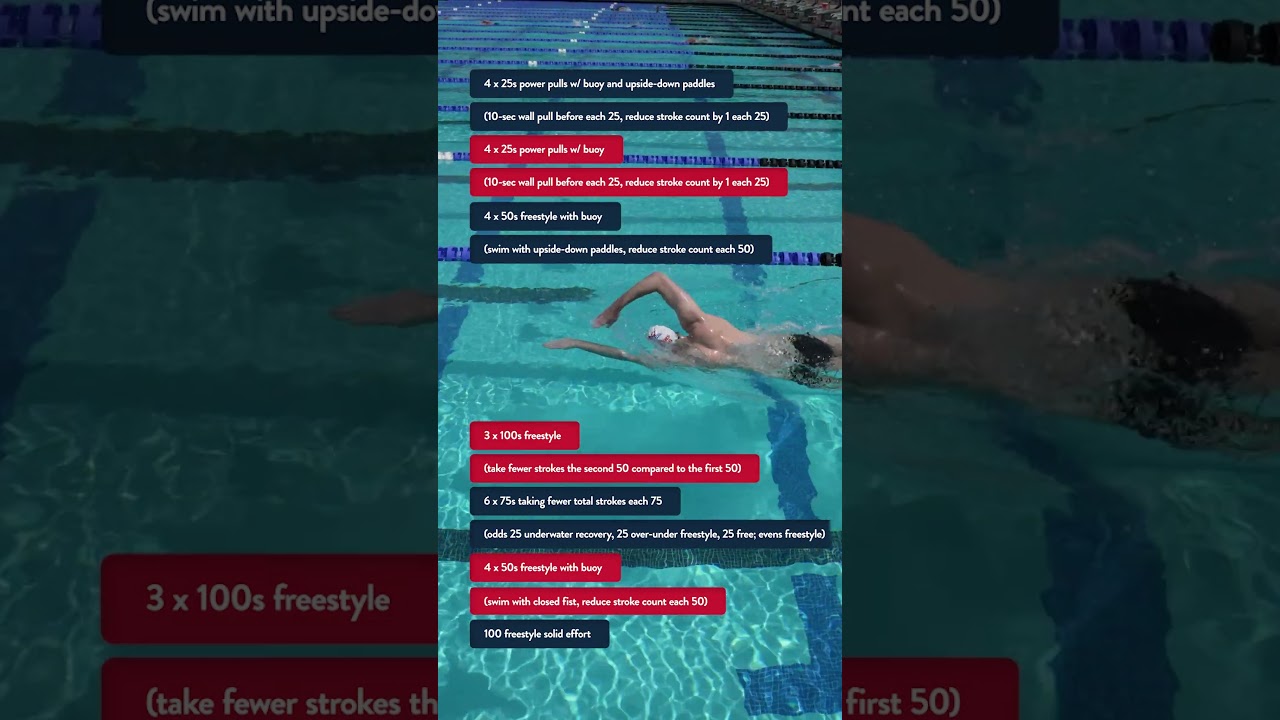
- 4 x 25s power pulls with buoy and upside-down paddles (10-second wall pull before each 25, reduce stroke count by 1 each 25)
- 4 x 25s power pulls with buoy (10-second wall pull before each 25, reduce stroke count by 1 each 25)
- 4 x 50s freestyle with buoy (swim with upside-down paddles, reduce stroke count each 50)
- 3 x 100s freestyle (take fewer strokes the second 50 compared to the first 50)
- 6 x 75s taking fewer total strokes each 75 (odds 25 underwater recovery, 25 over-under freestyle, 25 freestyle; evens freestyle)
- 4 x 50s freestyle with a buoy (swim with closed fist, reduce stroke count each 50)
- 100 freestyle solid effort
Purpose and Focus Points
This set increases in complexity and challenge to provide more learning opportunities. Multiple parts of it require a modification of your pulling pattern. Your goal remains to develop a direct pulling pattern that uses a large part of your arm.
The same basic exercises are included yet modified to make them more difficult. There are more stringent stroke count requirements that’ll force you to change your pulling pattern. The closed fists and upside-down paddles drills further encourage more effective pulling patterns. The changing demands will keep you focused on improving.
Set 4
(2 times through)
Take about 20 seconds rest after the 25s
Take about 10 seconds rest between each repetition of the 50s/75s/100s
Take about 30 seconds rest after the final 50/75/100
- 2 x 25s power pulls with buoy (odds as few strokes as possible, evens build speed)
- 6 x 50s freestyle (25 closed fist, 25 open hands; achieve the same total stroke count each 50)
- 2 x 25s human paddle with buoy (odds as few strokes as possible, evens build speed)
- 4 x 75s freestyle with upside-down paddles (achieve the same total stroke count each 75)
- 2 x 25s power catch-up with buoy (odds as few strokes as possible, evens build speed)
- 3 x 100s freestyle (achieve the same total stroke count each 100)
Purpose and Focus Points
This set is focused on establishing effective pulling patterns, then learning to sustain those patterns. You’ll do the same basic drills in more challenging situations. Perform the drills with a focus on both efficiency and speed.
The freestyle segments focus on maintaining a consistent stroke count throughout while performing the repetitions on short rest. Executing efficient strokes is the goal, not speed. Doing the freestyle segments with different hand configurations encourages more effective pulling patterns. If wall pull is helpful, feel free to incorporate it prior to any of the 25s.

Set 5
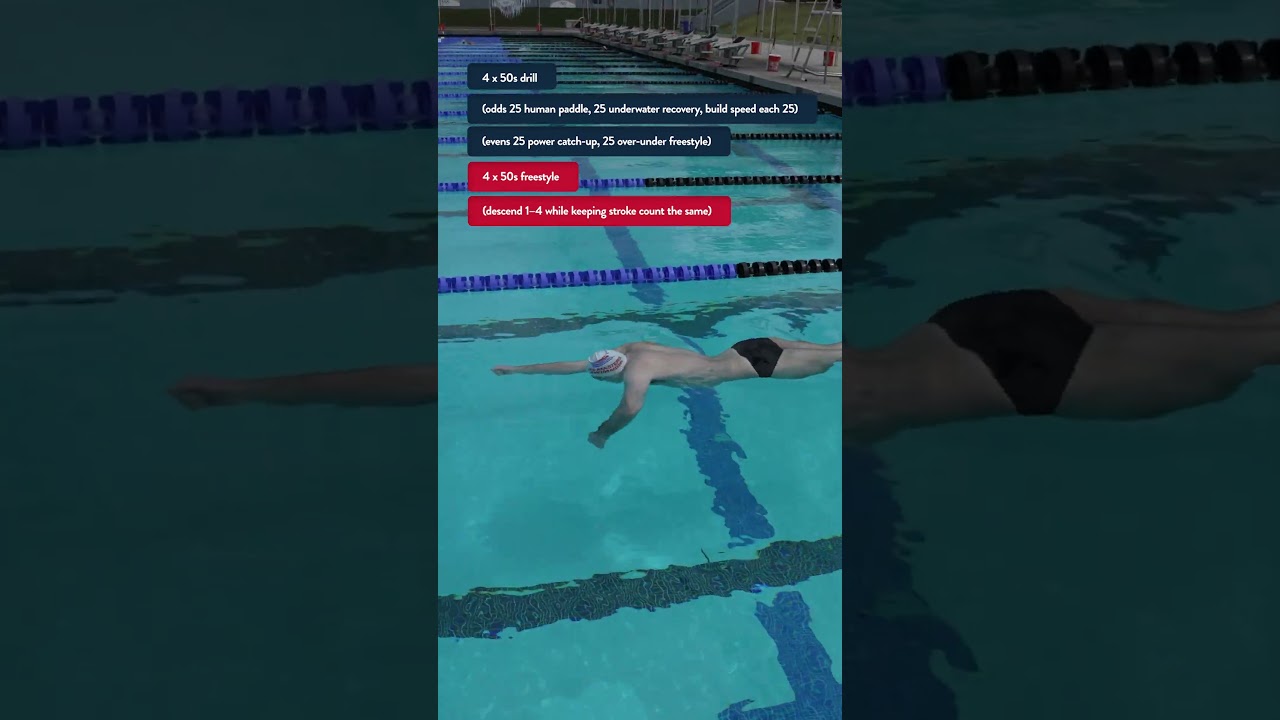
(3 times through)
Round 1 closed fists, round 2 upside-down paddles, round 3 open hands
Take about 30 seconds rest between repetitions
Take about 60 seconds rest between rounds
- 4 x 50s drill (odds 25 human paddle, 25 underwater recovery, build speed each 25; evens 25 power catch-up, 25 over-under freestyle)
- 4 x 50s freestyle (descend 1–4 while keeping stroke count the same [descend means you get faster on each one])
Purpose and Focus Points
This set is for learning to swim fast with effective pulls. The goal is to add speed to the drills, building speed each 25.
You’ll do several drills and do them differently each round. This variety increases your engagement and encourages learning.
During the second segment of 4 x 50s, your goal is to learn to create speed without sacrificing the effectiveness of your pull. This can be accomplished by increasing your speed without increasing your stroke count. Measuring both your speed and stroke count provides a more comprehensive measurement of performance. If wall pull is helpful, feel free to incorporate it prior to any of the drill repetitions.
- All of the sets were written by Andrew Sheaff
Want to Improve Your Swimming?
Input your email below to get great swimming articles, videos, and tips sent to you monthly. (USMS members already get it)
Thanks! We just sent you your first email and will you should receive at least one monthly.
Dryland Exercises
Setting up Your Stroke
Although your catch is a relatively simple movement, it’s a counterintuitive one. Beginning to understand this skill is more difficult in the water.
To learn this movement, practice the basic motion out of the water. You can practice this movement anywhere, including while resting between repetitions during a workout. It’s a simple way to reinforce this critical skill.
To perform this exercise, stand with one arm reaching overhead. Rotate your hand down while simultaneously bending your elbow to the side. This simple movement should result in your hand going from pointing vertically to pointing horizontally, with your elbow pointing out to the side. Reverse this motion to return to the starting point and repeat. The key movement is moving your hand through your catch with your elbow elevated.

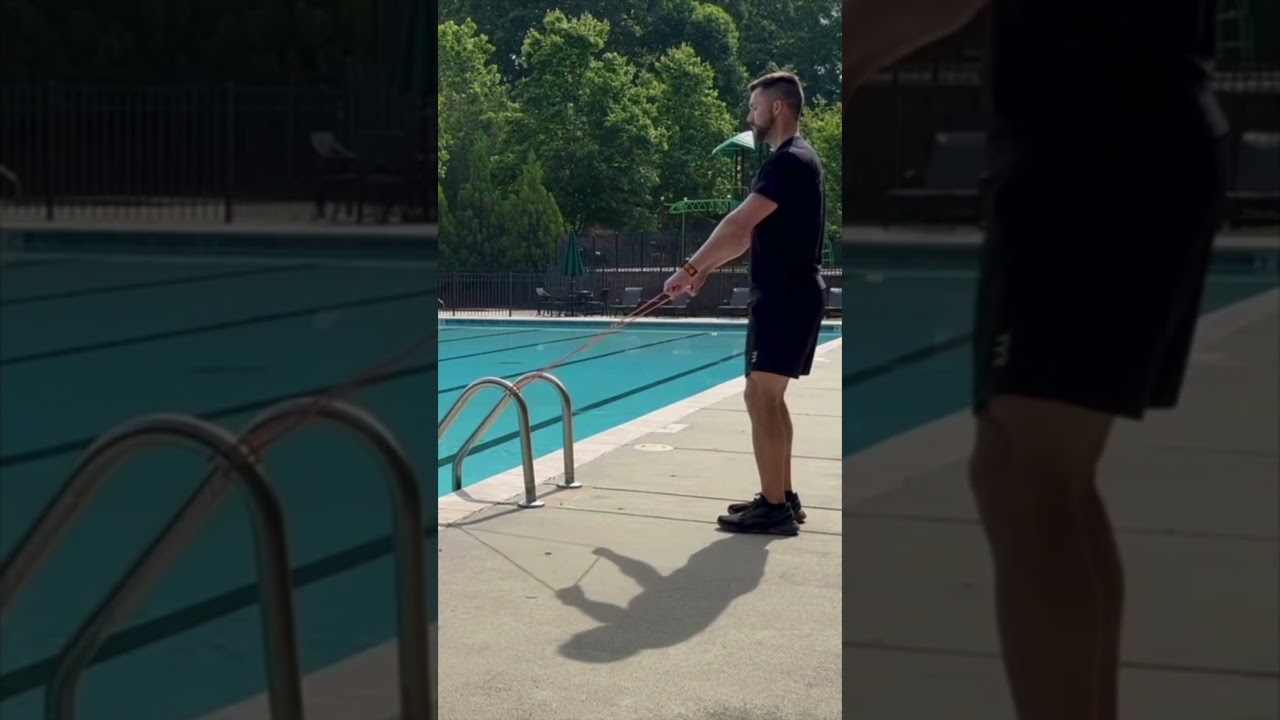
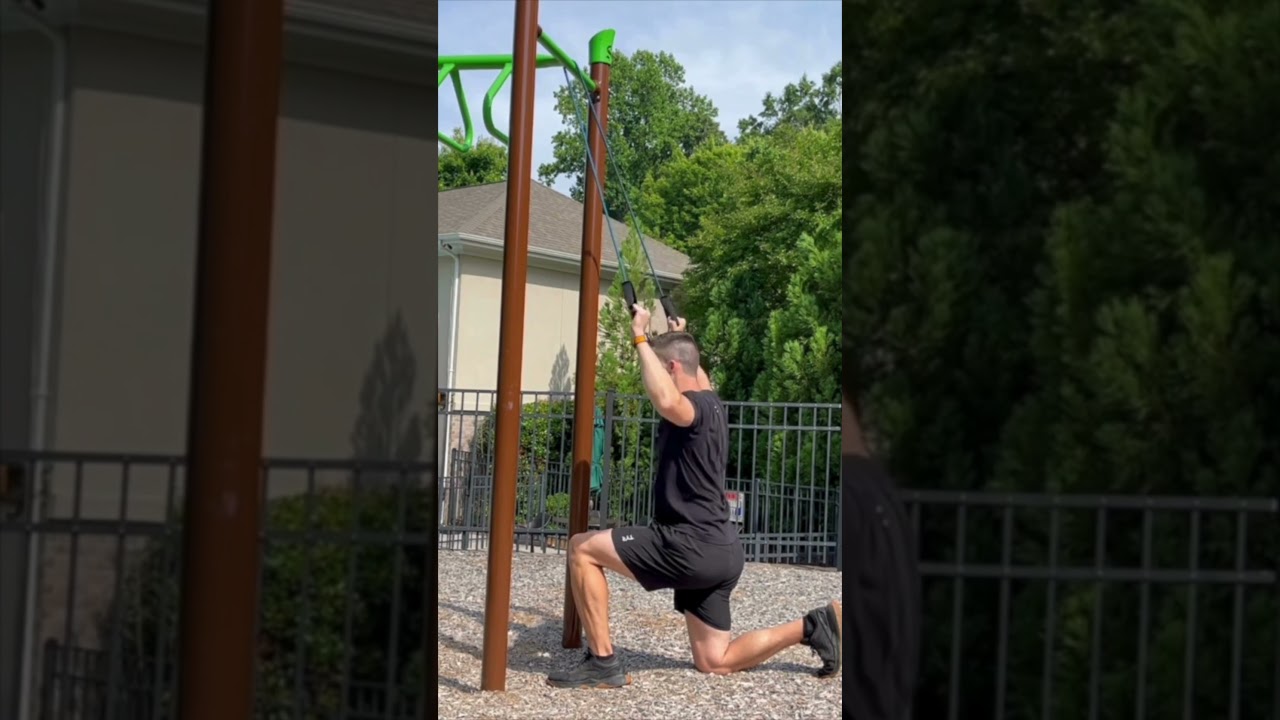
Cord Squeeze
The purpose of this exercise is to help you feel the contraction of the strong muscles of your back. These muscles are most effective at creating a powerful pull.
This is less of a strength exercise and more of a learning tool. It can help increase your awareness of how to use these muscles. That awareness can help you pull more effectively in the water.
To perform this exercise, attach a stretch cord or elastic band to an immovable object. With straight arms, pull against the cord and bring your hands down to your hips. Hold that position for 3–5 seconds. Release the tension and let your hands move back up. Step back far enough so that a fair amount of tension is present during the final position. It should be challenging, but manageable.
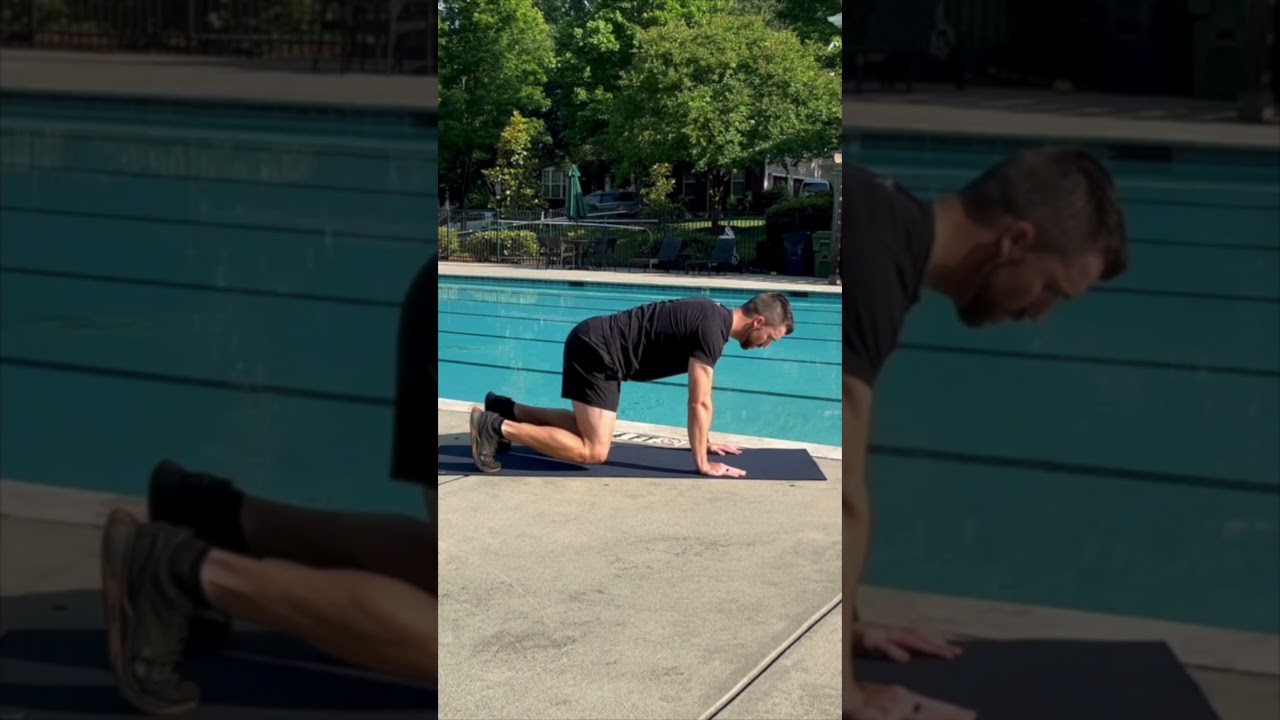
Bear Plank
The bear plank is like a regular plank except that your bent legs reduce the contribution of your hip flexors. As a result, your shoulders and abs are required to pick up the slack. The emphasis on your shoulders helps to enhance the ability to keep your shoulders stable.
One issue with traditional planks is that swimmers can extend their back excessively to create stability. In contrast, the bending of your knees promotes a flatter or more rounded back, strengthening your abs.
To perform this exercise, get on your hands and knees. Push into the ground with your hands and lift your knees slightly off the ground. Keep your knees as low as possible and keep your head up. Your hands should be straight underneath your shoulders and your knees should be directly underneath your hips.
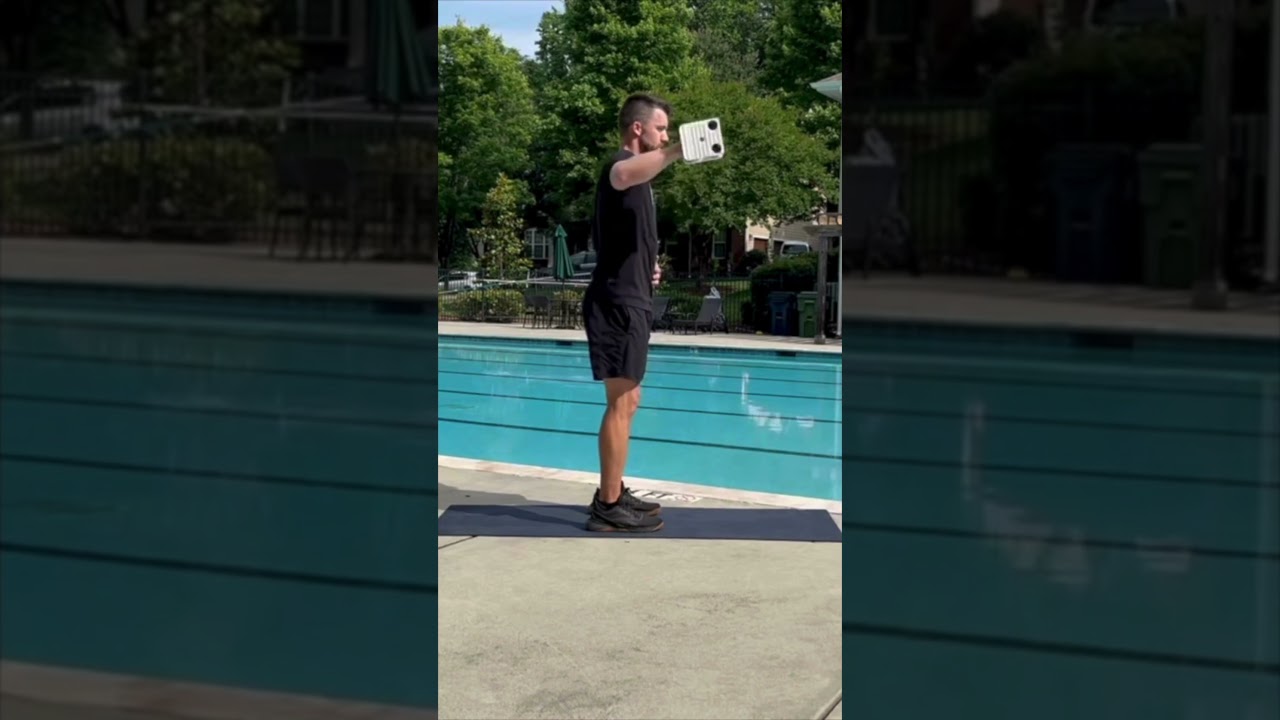
Dumbbell Pullover
The purpose of this exercise is to improve range of motion through your shoulder, as well as improve strength throughout that range of motion. Full range of motion of your shoulder is important for optimizing your pulling, allowing you to execute a strong pull for a longer period.
During this exercise, focus on keeping your back flat and your abs tight. This will ensure that you’re creating range of motion through your shoulders rather than your spine.
To perform this exercise, lie sideways across a bench, with your feet firmly on the floor. Hold a dumbbell straight above your chest with both arms. Without changing your body position, lower the dumbbell over your head. Continue to lower until you feel a slight stretch. You can bend your elbows slightly, but do not exaggerate it. Raise the dumbbell back over your head.

Dumbbell External Rotation
Strong pulls require strong internal rotation forces in your shoulder. To ensure you have balanced strength in your shoulder, this exercise improves your external rotation strength.
Rather than strengthening movements used in swimming, the goal is to strengthen the opposite movement. Another way to think of it is that it helps to strengthen your brakes. Doing so will allow you to safely apply more gas to your pull.
To perform this exercise, grab a very light dumbbell. Standing tall, hold the dumbbell with your shoulder at a 90-degree angle and your elbow at a 90-degree angle to your shoulder. The dumbbell should point to the ceiling. Under control, rotate the dumbbell forward and then back up until it points toward the ceiling again. The entire movement should cover about 160 degrees of motion, though you can stop at 90 degrees on the way down if you struggle with shoulder pain.
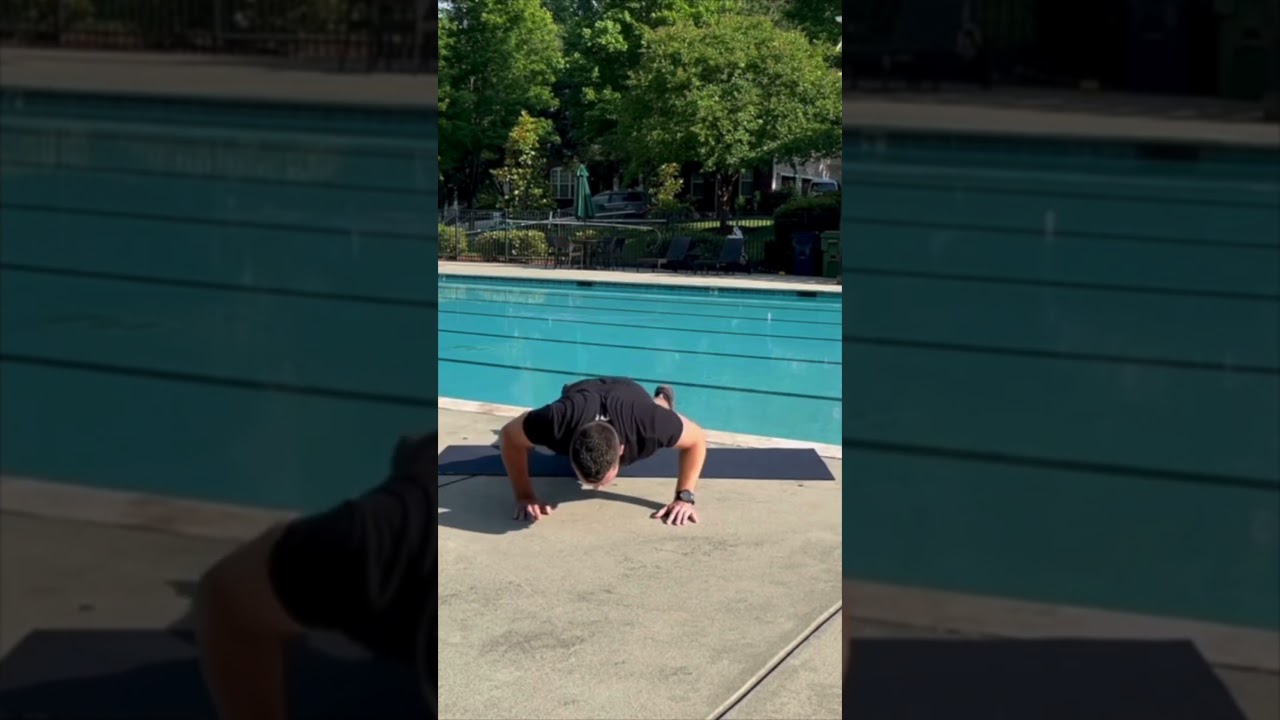
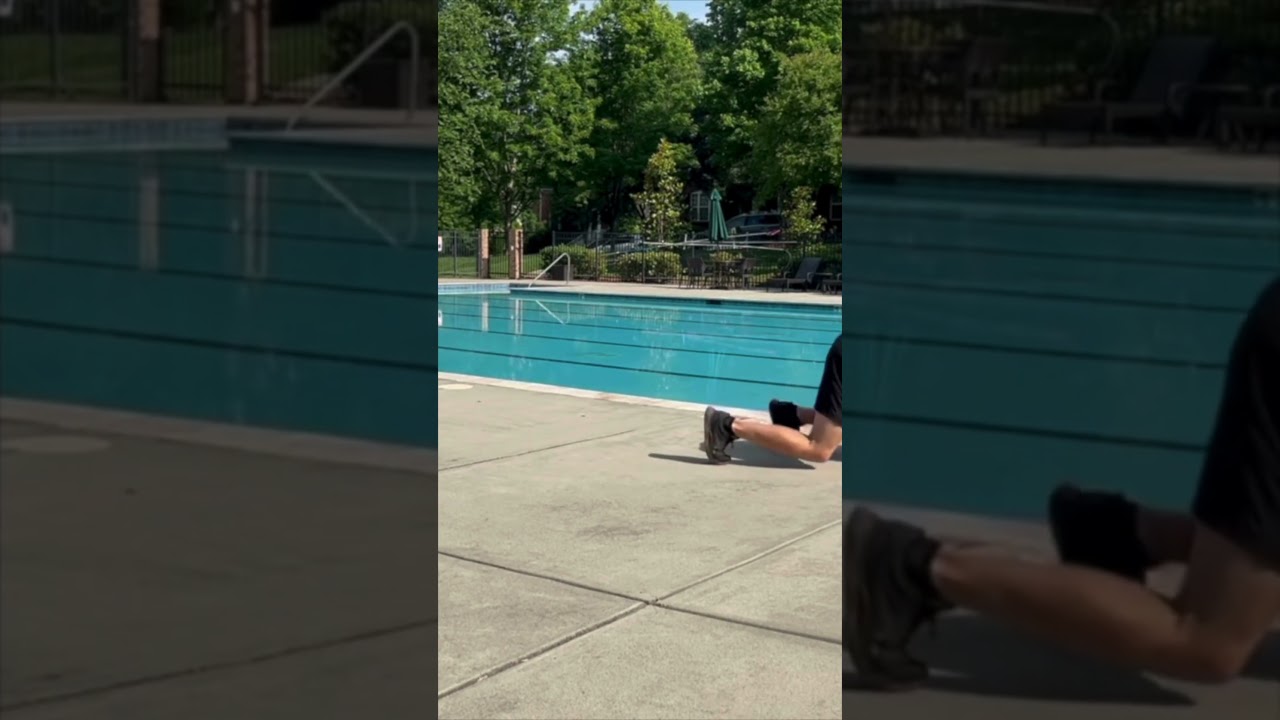
Push-Up
Push-ups are a tremendous and easily accessible way to strengthen your chest and triceps, two muscle groups that play a large role in creating propulsion. Push-ups also train your torso stability. Most important, push-ups develop the ability to create force while maintaining a stable torso. This is a critical skill in swimming because you must perform effective pulls while maintaining proper body alignment in the water.
If you struggle with push-ups, perform them on an incline. Start with a steep incline and then reduce the incline as you get stronger.
To perform this exercise, assume a plank position with your spine straight. Without losing the straight-line position, lower your body so that your chest touches the ground. Your elbows should not be flared out to the side or tucked into your body. They should be at approximately a 45-degree angle. If this version is too difficult, perform the exercise on an incline that allows you to achieve a full range of motion.
Pull-Down
The purpose of this exercise is to strengthen the muscles of your back responsible for great pulling. Strengthening these muscles can create more horsepower for effective pulling. It’s important to control the weight while using a full range of motion to ensure that you’re improving the range of motion you use while swimming. If you’re strong at pull-downs, pull-ups are a great progression to enhance the challenge.
To perform this exercise, use a lat pull-down machine. You can use whichever bar or handle you prefer. Assume a tall posture. Without changing your posture, pull the bar down so that your elbows squeeze into your rib cage. Return the weight with control, also without any change in posture. Depending on the length of your arms, the bar may come down to your chin or below. Focus on squeezing your elbows to your torso to determine your range of motion.
Bear Crawl
A key skill in freestyle is the ability to move your limbs in opposition while maintaining tension through your torso. The bear crawl places a premium on maintaining torso stability while moving. Your arms and legs must also be coordinated in opposition to each other, engaging your whole body.
More so than other traditional core exercises, the bear crawl involves dynamic movement of your torso, just as in freestyle. You must learn to create stability while also allowing enough mobility to move forward.
To perform this exercise, go to the floor on your hands and knees. Lift your knees slightly off the ground, and then take a small step forward with one arm and the opposite leg. Place them back on the ground and step forward with the other arm and leg. Continue to move forward. When performing this exercise, keep your hips low with your knees just off the ground and your head up. Focus on moving with control rather than taking large steps or moving quickly.
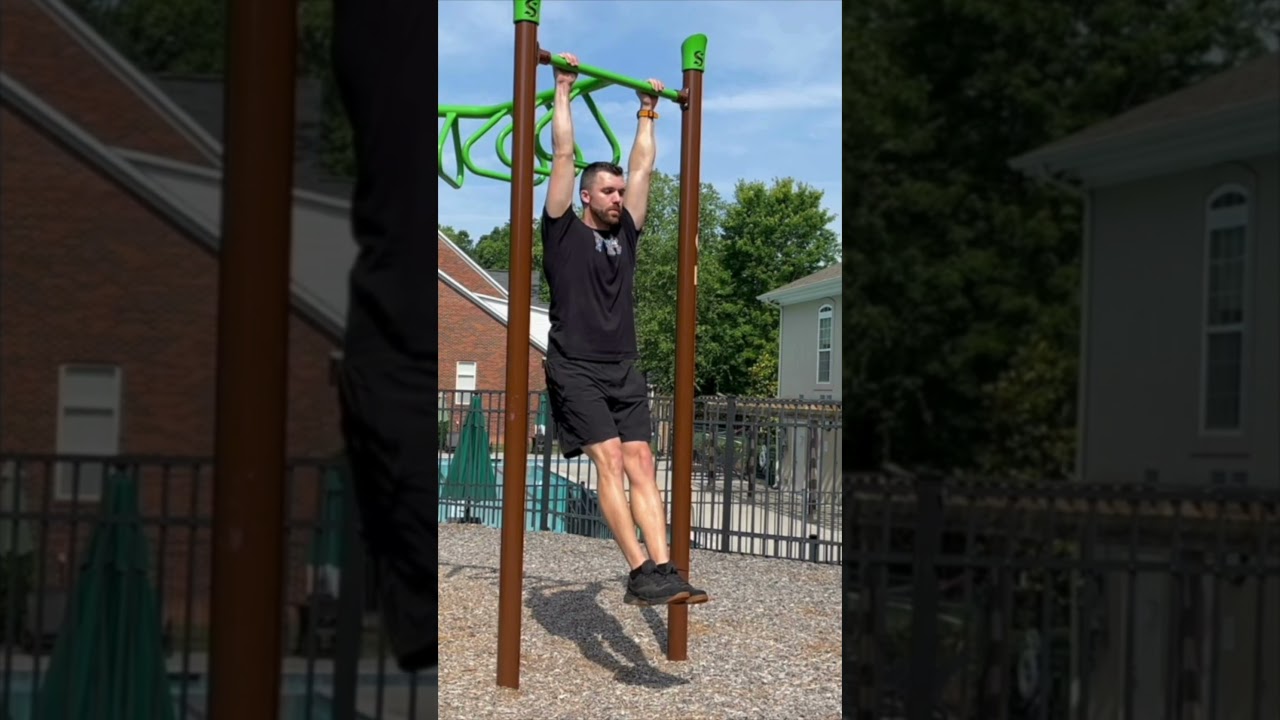
Bar Hang
Swimming long distances or at fast speeds can compress your shoulders, rib cage, and spine because of the intense effort your upper body produces. Bar hangs can help counteract this effect by using gravity to expand everything. Because there’s a resistance component to hanging on the bar, this exercise develops strength throughout the range of motion you’re developing as well.
If this exercise is too difficult, start with your feet on the floor and then take more weight off your feet as you improve.
To perform this exercise, find a pull-up bar. Grasp the bar with an overhand or underhand grip approximately shoulder-width apart, whichever you prefer. Squeeze the bar tight and lift your legs off the ground, preferably slightly in front of your body. Hold this position for a predetermined amount of time. If that bar is higher than you can reach, step on a bench or chair, grab the bar, then slowly step off the bench or chair.
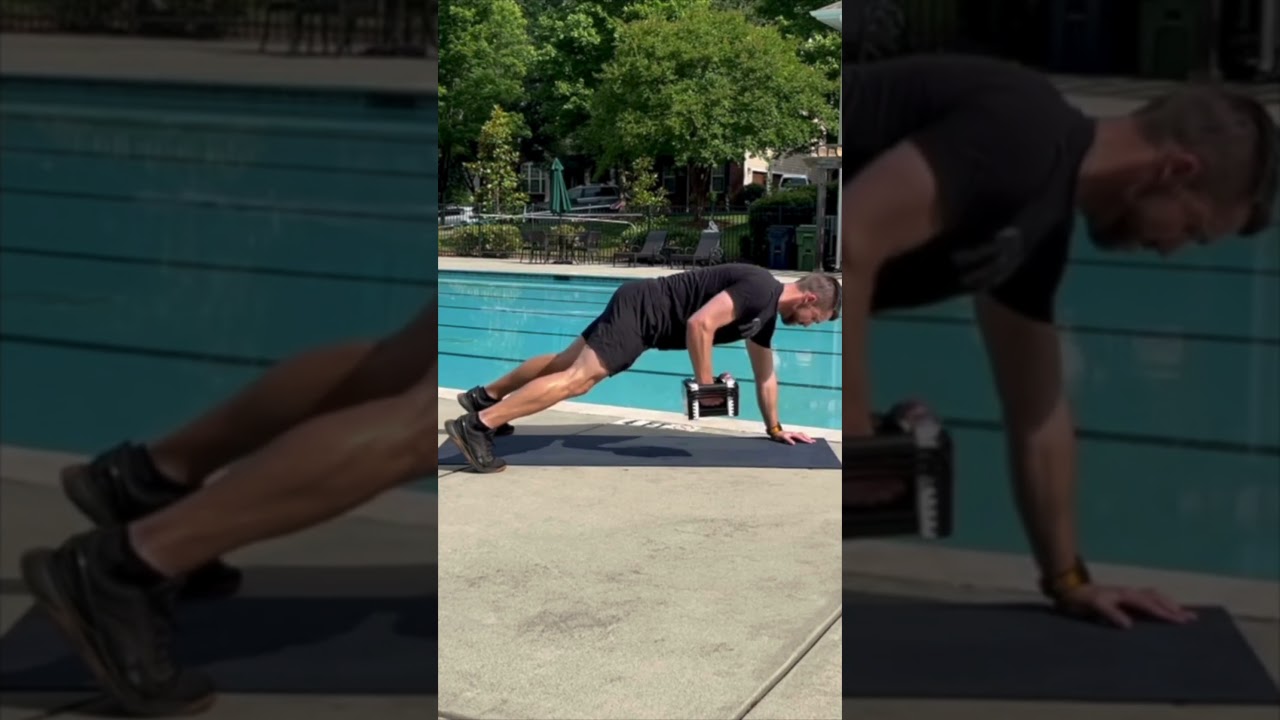
Plank Row
When swimming freestyle, one arm recovers while your other arm pulls backward. Your arms are moving in opposite directions and, when swimming fast, at high speeds and high effort.
The plank row teaches you how to create force in opposite directions because one arm must support the weight of your body while your other arm pulls backward. At the same time, maintain tension through your torso so that your pulling arm can work against the force created by the supporting arm, just as in freestyle.
To perform this exercise, get into a plank position with two dumbbells just outside your hands. In an alternating fashion, grasp one dumbbell and row it up to your torso. When doing so, aim to move your body as little as possible. Lower the dumbbell to the floor, put your hand back on the floor, and grasp the other dumbbell. Row it up to your torso, aiming to move the body as little as possible. Repeat.
- All of the dryland exercises written by Bo Hickey
Want to Improve Your Swimming?
Input your email below to get great swimming articles, videos, and tips sent to you monthly. (USMS members already get it)
Thanks! We just sent you your first email and will you should receive at least one monthly.
This is the detailed page on freestyle pulling. You can find the other three parts of the stroke broken down in detail below.


